DIY Spray Foam Insulation: 7 Proven Steps to Slash Bills & Boost Home Comfort
Are you tired of sky-high energy bills and drafty rooms? You’re not alone. Thousands of homeowners are discovering that DIY spray foam insulation can transform their homes into energy-efficient havens while saving hundreds—even thousands—of dollars compared to professional installation.
But here’s the thing: spray foam isn’t your typical weekend project. It requires knowledge, preparation, and respect for safety protocols. That’s why I’ve created this comprehensive guide to walk you through everything you need to know about tackling diy spray foam insulation with confidence.
By the end of this guide, you’ll understand when DIY makes sense, how to choose between open-cell and closed-cell foam, and exactly how to apply it safely and effectively. Let’s dive in.
Table of Contents
Is DIY Spray Foam Insulation Right for You? Weighing Pros & Cons
Before you grab that spray foam kit, let’s be honest about what you’re getting into. DIY spray foam insulation can be incredibly rewarding, but it’s not for everyone.
The Benefits of Spray Foam (Why It’s Worth It)
Unmatched Air Sealing & Energy Efficiency Unlike traditional insulation that just slows heat transfer, spray foam creates an airtight seal. We’re talking about eliminating those sneaky air leaks that can account for up to 40% of your energy loss.
Superior Thermal Performance (High R-Value) Closed-cell spray foam delivers R-6 to R-7 per inch—nearly double what you get from fiberglass batts. That means better insulation with less thickness.
Moisture Barrier & Mold Prevention Closed-cell foam acts as a vapor barrier, keeping moisture out and mold at bay. This is especially crucial in basements and crawl spaces where humidity loves to lurk.
Pest Deterrent Rodents and insects hate spray foam. It’s like creating a fortress around your home that critters can’t penetrate.
Improved Indoor Air Quality (Acoustics & Allergens) Beyond blocking allergens and outdoor pollutants, spray foam significantly reduces noise transmission between rooms.
Structural Integrity (Closed-Cell) Here’s a bonus: closed-cell foam actually strengthens your walls by adding structural rigidity. It’s like giving your home a protective exoskeleton.
The DIY Challenge: Is It Truly Worth Doing Yourself?
Cost Savings vs. Professional Installation The numbers are compelling. Professional spray foam installation typically runs $1.50-$3.00 per board foot. Quality DIY kits? Often under $1.00 per board foot. On a 1,000 square foot project, you could save $1,000-$2,000.
Learning Curve & Skill Required Let’s be real—there’s a learning curve. You’ll need to master proper spraying technique, understand foam chemistry, and develop an eye for even application. But it’s not rocket science.
Time Commitment Plan for prep time. Lots of it. Professional installers can knock out projects quickly because they’ve done this thousands of times. Your first project will take significantly longer.
Potential for Mistakes & Waste Overspray, uneven application, and material waste are common rookie mistakes. Budget for 10-15% extra material on your first project.
Safety Risks (When Not Done Properly) This isn’t optional: improper ventilation or skipping safety gear can lead to serious health issues. We’ll cover this extensively in our safety section.
Long-Term Investment & Payback Period Most homeowners see their investment pay for itself within 2-4 years through energy savings. That’s a solid return that keeps giving year after year.
Understanding Spray Foam: Open-Cell vs. Closed-Cell for DIYers
Choosing between open-cell and closed-cell foam is crucial for project success. Here’s what you need to know.
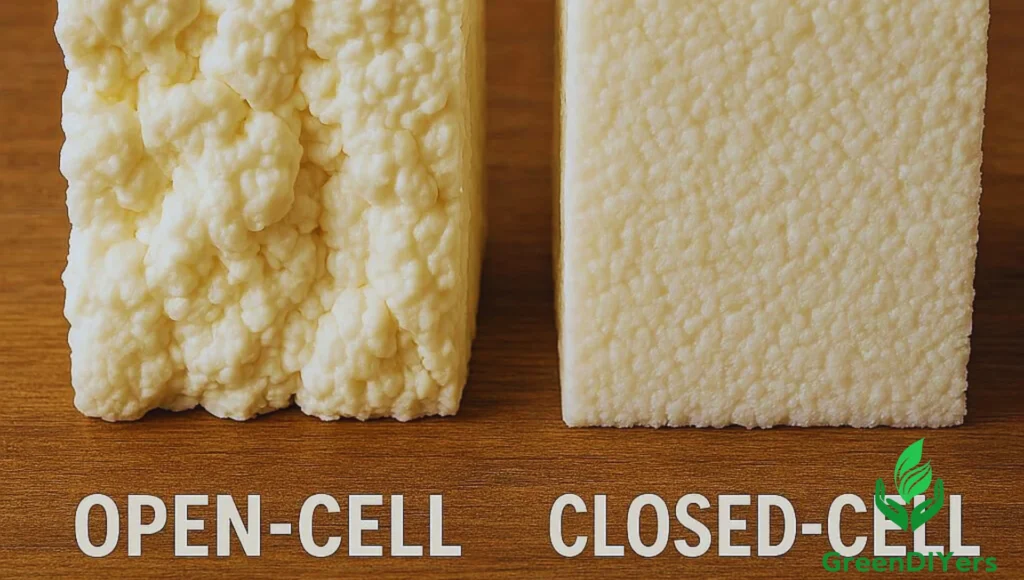
Open-Cell Spray Foam Explained
Description & Properties Open-cell foam is soft, flexible, and has a lower density (around 0.5 pounds per cubic foot). Think of it like a kitchen sponge—it has interconnected cells that allow air and moisture to pass through.
Best Applications
- Interior walls for soundproofing
- Attic insulation DIY projects where vapor permeability is desired
- Areas where you need easy trimming and shaping
Pros
- More cost-effective than closed-cell
- Fills cavities easily and conforms to irregular shapes
- Easier to trim with a utility knife
- Better for soundproofing applications
Cons
- Vapor permeable (not a moisture barrier)
- Lower R-value per inch (R-3.5 to R-4)
- Can absorb water if exposed to moisture
Closed-Cell Spray Foam Explained
Description & Properties Closed-cell foam is rigid, dense (around 2 pounds per cubic foot), and creates a solid barrier. Imagine styrofoam—that’s the texture and strength you’re working with.
Best Applications
- Exterior walls and rim joists
- Crawl space insulation and foundation walls
- Basement insulation projects
- Areas requiring structural reinforcement
- Anywhere you need a vapor barrier
Pros
- Acts as a vapor barrier (crucial for moisture control)
- Higher R-value per inch (R-6 to R-7)
- Adds structural rigidity to walls
- Excellent water resistance
Cons
- More expensive per board foot
- Harder to trim (requires reciprocating saw)
- Higher expansion pressure can damage framing if overapplied
Choosing the Right Foam for Your Project
| Property | Open-Cell | Closed-Cell |
|---|---|---|
| R-Value per inch | R-3.5 to R-4 | R-6 to R-7 |
| Vapor permeability | Yes | No (vapor barrier) |
| Cost per board foot | Lower | Higher |
| Best DIY spray foam for beginners | ✓ | Advanced projects |
| Soundproofing | Excellent | Good |
| Structural support | None | Significant |
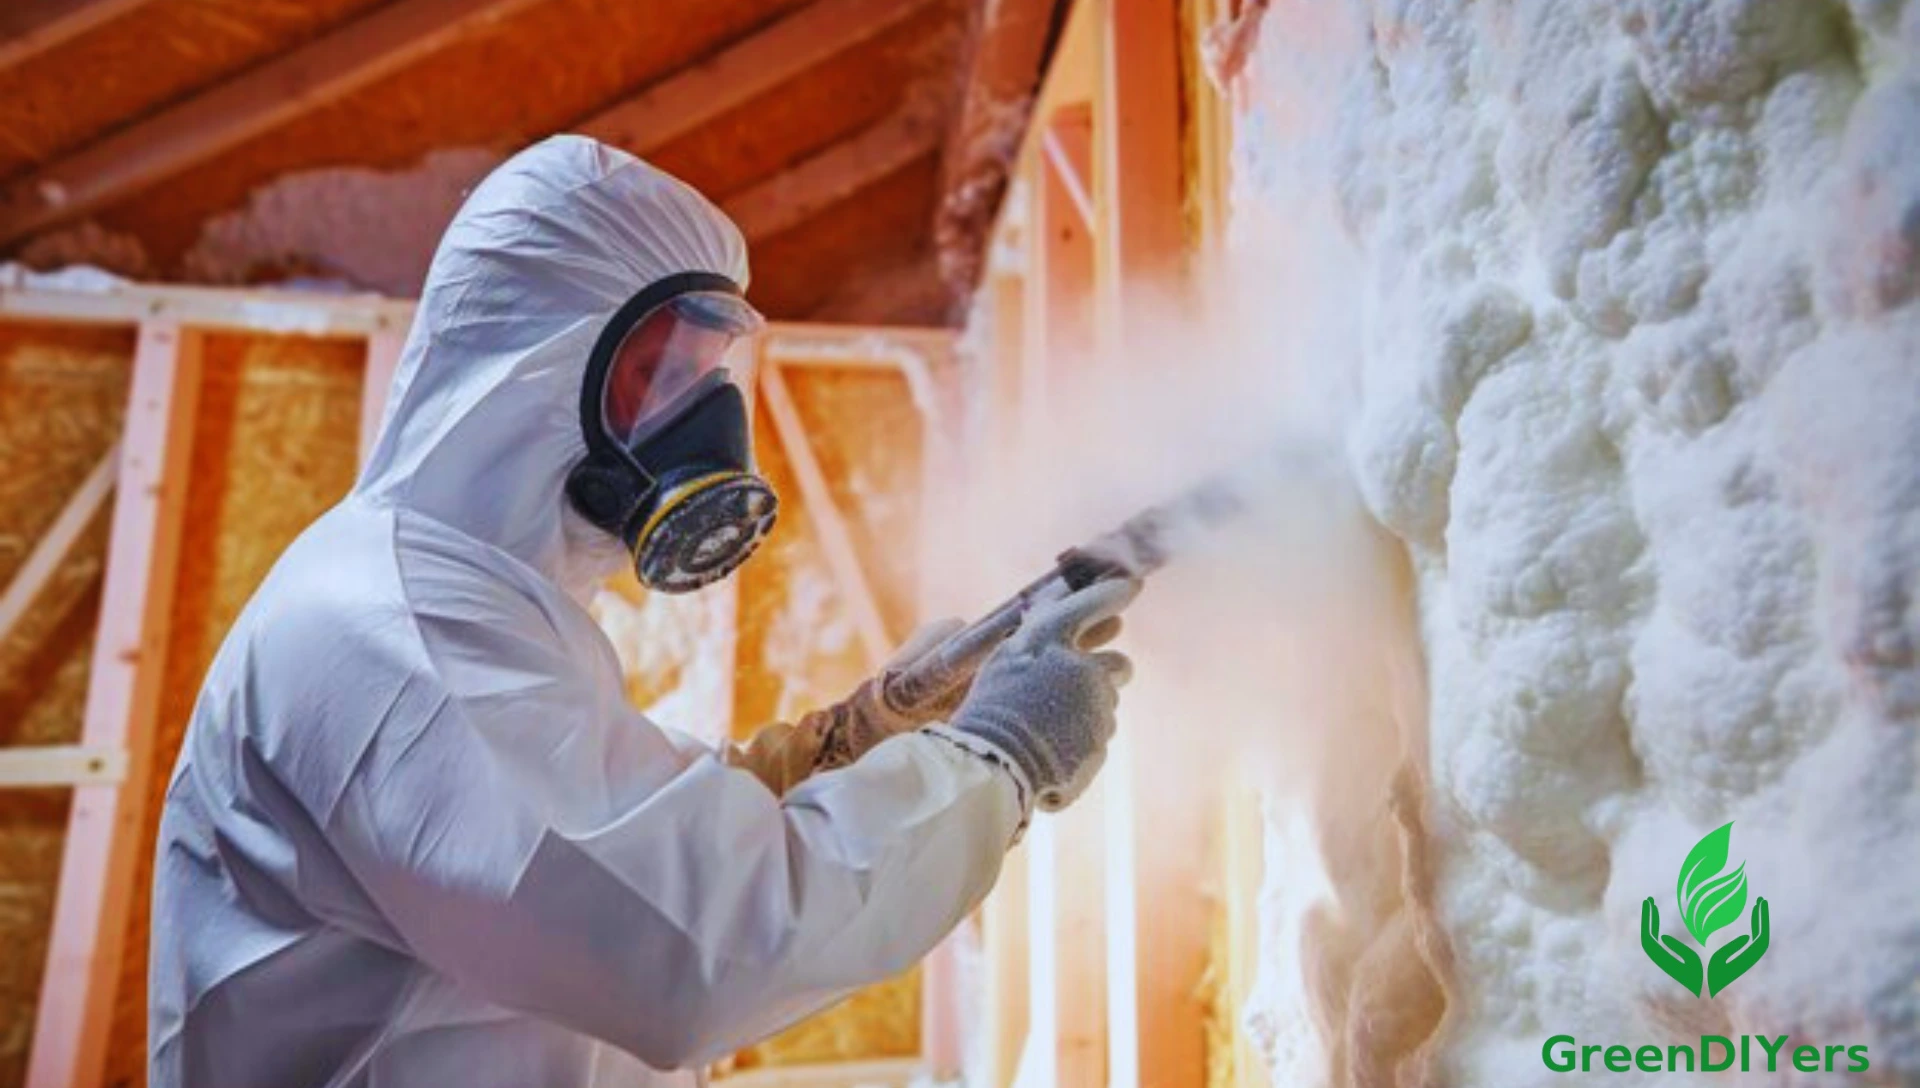
Safety First: Essential Precautions for DIY Spray Foam
Let me be crystal clear: spray foam safety isn’t negotiable. The chemicals involved can cause serious respiratory and skin issues if you don’t follow proper protocols.
Personal Protective Equipment (PPE) Checklist
Full-Face Respirator Don’t mess around with a dust mask. You need a full-face respirator with organic vapor cartridges rated for isocyanates. Brands like 3M and Honeywell make suitable models.
Disposable Overalls/Coveralls Tyvek suits are your friend. They’re inexpensive and prevent foam from getting on your clothes and skin.
Chemical-Resistant Gloves Nitrile gloves won’t cut it. You need chemical-resistant gloves that can handle aggressive solvents.
Eye Protection If you’re not using a full-face respirator, safety goggles are mandatory. Foam overspray can cause serious eye irritation.
Foot Protection Chemical-resistant shoe covers or dedicated work boots. Trust me, you don’t want to track foam chemicals through your house.
Ventilation Strategies (Crucial for Health)
Opening Windows & Doors Create cross-ventilation by opening windows and doors at opposite ends of your work area. This creates airflow that carries fumes away.
Using Exhaust Fans & Air Movers Position fans to pull air out of the work area, not blow it around. You want to create negative pressure that draws fresh air in and contaminated air out.
Isolating the Work Area Use plastic sheeting to separate your work area from the rest of your home. This prevents fumes from migrating to living spaces.
Post-Application Ventilation Times Plan for 24-48 hours of continuous ventilation after application. Don’t occupy the space until chemical odors have completely dissipated.
First Aid & Emergency Preparedness
Skin Contact Protocol Remove contaminated clothing immediately. Wash affected area with soap and water for at least 15 minutes. Don’t use solvents on skin.
Inhalation Protocol Get to fresh air immediately. If breathing difficulties persist, seek medical attention. Keep the product’s Safety Data Sheet (SDS) handy for medical professionals.
Eye Contact Protocol Flush eyes with clean water for 15 minutes minimum. Remove contact lenses if present and easily removable. Seek immediate medical attention.
Handling & Storage of Chemicals
Temperature Requirements Most DIY spray foam insulation kits work best when components are at 70-80°F. Store tanks in a climate-controlled environment before use.
Disposal Guidelines Empty containers can often go in regular trash, but check local regulations. Never incinerate or puncture pressurized containers.
Your DIY Spray Foam Kit: Selection & Setup
Choosing the right kit can make or break your project. Here’s how to select and set up your system properly.
Types of DIY Kits Available
Small Cans (for minor gaps) Great Touch ‘n Foam cans are perfect for small gaps around windows and doors. Think gaps less than 2 inches wide.
Disposable Two-Component Kits Froth-Pak kits from Dow are popular choices. These give you 15-600 board feet of coverage and are perfect for medium projects.
Refillable/Reusable Systems For larger projects, systems like those from Spray Foam Equipment allow you to buy bulk chemicals and refill tanks. More complex but cost-effective for big jobs.
Key Factors When Choosing a Kit
Yield (Board Feet Coverage) Calculate your needs carefully. Measure the area to be insulated and multiply by desired thickness. Add 15% for waste and mistakes.
Open-Cell vs. Closed-Cell Match the foam type to your application. When in doubt, closed-cell is more versatile but costs more.
Nozzle Quality & Variety Look for kits that include multiple nozzle types: fan tips for large areas, cone tips for precision work, and extension wands for hard-to-reach spaces.
Manufacturer Reputation & Support Stick with established brands like Dow, Honeywell, or Spray Foam Equipment. Good technical support can save your project when things go wrong.
Cost per Board Foot Calculate the true spray foam cost by dividing total kit price by board feet coverage. Don’t forget to factor in PPE and tool costs.
Essential Tools & Materials (Beyond the Kit)
Plastic Sheeting & Painter’s Tape You’ll use more than you think. Buy quality painter’s tape that won’t leave residue.
Utility Knife / Reciprocating Saw Sharp utility knives work great for open-cell foam. Closed-cell requires a reciprocating saw with a sharp blade.
Mineral Spirits / Acetone Essential for cleaning reusable spray guns. Buy the good stuff—cheap solvents don’t clean effectively.
Work Lights You need to see what you’re doing. LED work lights provide bright, even illumination without generating heat.
Scaffolding / Ladder Safety first. Don’t try to spray foam while balancing precariously on a ladder.
Fire Extinguisher Keep a Class ABC fire extinguisher nearby. Some foam components are flammable during application.
Pre-Application Kit Setup & Testing
Temperature Conditioning Bring your kit components to the recommended temperature 24 hours before use. Cold chemicals don’t mix properly.
Attaching Hoses & Nozzles Follow manufacturer instructions exactly. Poorly connected components can fail under pressure, creating a dangerous situation.
Test Spraying Always test spray onto cardboard or scrap material first. Check for proper mixing (uniform color), consistency, and spray pattern.
Step-by-Step DIY Spray Foam Application Guide
Now for the moment of truth—actually applying your diy spray foam insulation. Take your time and follow these steps methodically.
Step 1: Prepare the Work Area (The Foundation of Success)
Clean & Dry Surfaces Remove dust, cobwebs, and debris with a shop vacuum. Any moisture must be eliminated—use fans and dehumidifiers if necessary.
Cover & Protect Mask everything you don’t want foamed. Use quality painter’s tape and plastic sheeting. Spray foam sticks to everything and is nearly impossible to remove.
Seal Penetrations Electrical and plumbing penetrations should be sealed with appropriate materials before foaming around them.
Remove Obstructions Old insulation, loose debris, and anything that could interfere with foam adhesion needs to go.
Step 2: Don Your PPE (No Exceptions!)
Double-check that your respirator seals properly, your coveralls are zipped up, and your gloves are chemical-resistant. This isn’t the time to cut corners.
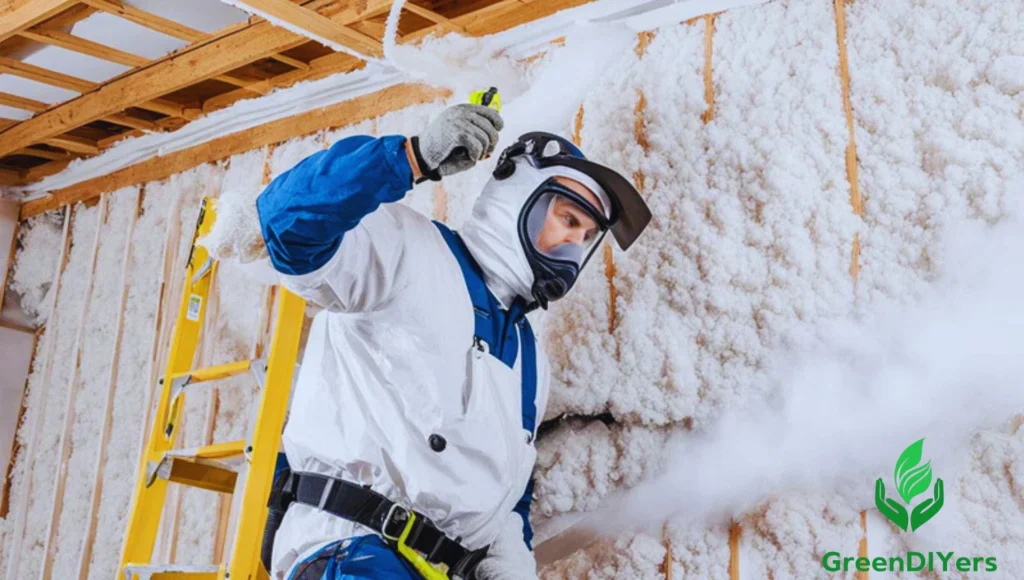
Step 3: Proper Spraying Technique (Achieving a Quality Finish)
Maintain Consistent Distance & Angle Hold the gun 12-18 inches from the surface at a slight angle. Spraying perpendicular creates more overspray.
Overlap Passes Build up foam in thin layers with each pass overlapping the previous by about 50%. Thick applications can shrink and pull away.
Targeted Application for Gaps vs. Open Cavities For gaps, use steady pressure and smooth motions. For large cavities, work systematically from one side to the other.
Dealing with Corners & Edges Corners are tricky. Start spraying before reaching the corner and continue past it to ensure complete coverage.
Knowing When to Stop Remember that foam expands. Stop when you’ve achieved about 75% of the desired thickness—expansion will do the rest.
Step 4: Trimming & Shaping (Open-Cell Foam)
Waiting for Curing Open-cell foam can usually be trimmed after 30-60 minutes. Closed-cell takes longer—sometimes several hours.
Using a Utility Knife / Reciprocating Saw Sharp blades are crucial. Dull blades tear foam rather than cutting cleanly.
Achieving a Flush Surface Use long, smooth strokes. Multiple shallow cuts work better than trying to remove too much material at once.
Step 5: Cleanup & Disposal
Cleaning the Spray Gun If using a reusable gun, clean it immediately after use with the recommended solvent. Cured foam in the gun means buying a new gun.
Proper Disposal Follow local regulations for disposing of empty containers and contaminated materials. Many areas have special collection days for chemicals.
Post-Application Ventilation Keep the area ventilated for 24-48 hours. Don’t occupy the space until chemical odors are gone.
Common DIY Spray Foam Mistakes & How to Avoid Them
Learn from others’ mistakes to ensure your project succeeds:
Underestimating Preparation
Rushing prep work leads to poor adhesion and messy results. Spend 50% of your project time on preparation.
Inadequate PPE & Ventilation
This can literally make you sick. Never compromise on safety equipment or ventilation.
Incorrect Temperature of Components
Cold chemicals don’t mix properly, resulting in poor foam quality and wasted materials.
Spraying Too Thick or Too Thin
Thick applications can shrink and pull away. Thin applications don’t provide adequate insulation. Build up gradually.
Uneven Application & Poor Adhesion
Inconsistent technique creates weak spots. Practice your technique before starting the actual project.
Ignoring Manufacturer Instructions
Every kit is different. Read and follow the specific instructions for your chosen product.
Improper Trimming
Trimming too early or with dull blades damages the foam structure and reduces performance.
Rushing the Process
Spray foam rewards patience. Take your time, work methodically, and don’t try to finish in one marathon session.
Cost Analysis: DIY Spray Foam vs. Professional Installation
Let’s talk numbers. Understanding the true costs helps you make an informed decision.
Calculating DIY Material Costs
Cost of Kits Quality kits range from $0.80-$1.20 per board foot. Budget projects might use lower-grade kits for $0.60-$0.80 per board foot.
Cost of PPE & Tools First-time costs: $200-$400 for quality safety equipment and tools. These are one-time investments that serve multiple projects.
Potential Waste Factor in 10-15% material waste for beginners. Experienced DIYers typically waste only 5-8%.
Estimating Professional Installation Costs
Factors Influencing Price Location, project complexity, foam type, and access difficulty all affect pricing. Urban areas typically cost more than rural locations.
Benefits of Professional Service Warranties, expertise, speed, and proper equipment. Professionals also handle all safety and disposal requirements.
When to DIY vs. When to Hire a Pro
Choose DIY for:
- Small to medium projects (under 2,000 board feet)
- Simple applications (crawl spaces, rim joists)
- When you have time to learn and practice
- Budget-conscious projects where you can accept some imperfection
Hire professionals for:
- Large commercial projects
- Complex applications requiring specialized equipment
- When time is critical
- Areas where code compliance is strict
- If you’re uncomfortable with safety requirements
FAQs About DIY Spray Foam Insulation
“Can I spray foam insulation myself?” Absolutely, but success requires proper preparation, safety equipment, and realistic expectations about the learning curve.
“How much does a DIY spray foam kit cost?” Kits range from $300-$800 for most residential projects, depending on coverage area and foam type.
“Is DIY spray foam toxic?” During application, yes—proper PPE and ventilation are critical. Once fully cured, quality foam is safe for occupied spaces.
“How long does spray foam insulation last?” Quality spray foam insulation can last 80+ years without significant degradation when properly installed.
“Can I use spray foam on existing walls?” Yes, but access is key. You’ll need to create openings to inject foam or remove wall coverings for direct application.
“What’s the difference between froth pak and professional spray foam?” Froth Pak and similar DIY systems use the same chemistry as professional systems but in smaller, more user-friendly packages.
Empowering Your Home with DIY Spray Foam (and When to Call a Pro)
DIY spray foam insulation can transform your home’s energy efficiency while saving thousands of dollars. The key to success lies in thorough preparation, unwavering attention to safety, and realistic expectations about your skill level.
Remember: this isn’t a typical weekend project. Plan for learning, mistakes, and taking your time. When done correctly, you’ll enjoy lower energy bills, improved comfort, and the satisfaction of a job well done.
But here’s the bottom line—if you’re not comfortable with the safety requirements, complexity, or time commitment, professional installation is worth every penny. A properly installed system will outperform a poorly executed DIY job every time.
Ready to start your insulate home yourself journey? Gather your materials, prioritize safety, and tackle your project with confidence. Your energy bills will thank you for years to come.