Is the heat getting to you? Don’t break the bank on expensive cooling solutions! Whether you’re dealing with a broken AC unit, living in a dorm room, or just looking for an emergency cooling solution, building your own DIY air conditioner can provide immediate relief without emptying your wallet.
This comprehensive guide will walk you through multiple designs for creating an effective, budget-friendly DIY air conditioner using materials you can find at any hardware store. You’ll learn step-by-step instructions, discover optimization tips, understand the science behind homemade cooling, and most importantly, learn how to stay safe while building your own cooling solution.
Why go the DIY route? Sometimes life throws curveballs – your AC breaks down during a heatwave, you’re in temporary housing, or you simply need targeted cooling for a specific area. A homemade air conditioner can be a lifesaver in these situations, providing immediate relief while you figure out your long-term cooling strategy.
Table of Contents
Important Safety Disclaimer & Realistic Expectations (Must Read!)
Before we dive into building your DIY air conditioner, let’s set realistic expectations. This is not a replacement for commercial air conditioning systems. Your homemade cooling unit will work best in small, enclosed spaces and provides temporary relief rather than whole-room cooling.
Safety considerations you must understand:
- Electrical hazards: Always ensure fans are properly connected and keep electrical components away from water
- Water damage prevention: Place units on waterproof surfaces and have towels ready for condensation
- Mold prevention: Empty and dry your unit regularly, especially in humid conditions
- Proper ventilation: Never use these units in completely sealed spaces
Performance reality check: Your DIY air conditioner will lower the temperature in your immediate vicinity by 10-15 degrees at most. It won’t cool an entire room like a commercial unit, but it can make a significant difference in your personal comfort zone.
The Science Behind DIY Cooling: How Does it Work?
Understanding the science makes you a better builder. Your homemade air conditioner works on two main principles:
Evaporative cooling: As ice melts, it absorbs heat energy from the surrounding air. This process, called the latent heat of fusion, requires significant energy – about 80 calories per gram of ice melted.
Forced convection: The fan creates airflow over the cold surface, accelerating heat transfer and pushing the cooled air toward you. Without the fan, you’d just have a bucket of melting ice.
This combination creates a localized cooling effect that can drop the temperature in your immediate area by 10-15 degrees Fahrenheit, making unbearable heat much more manageable.
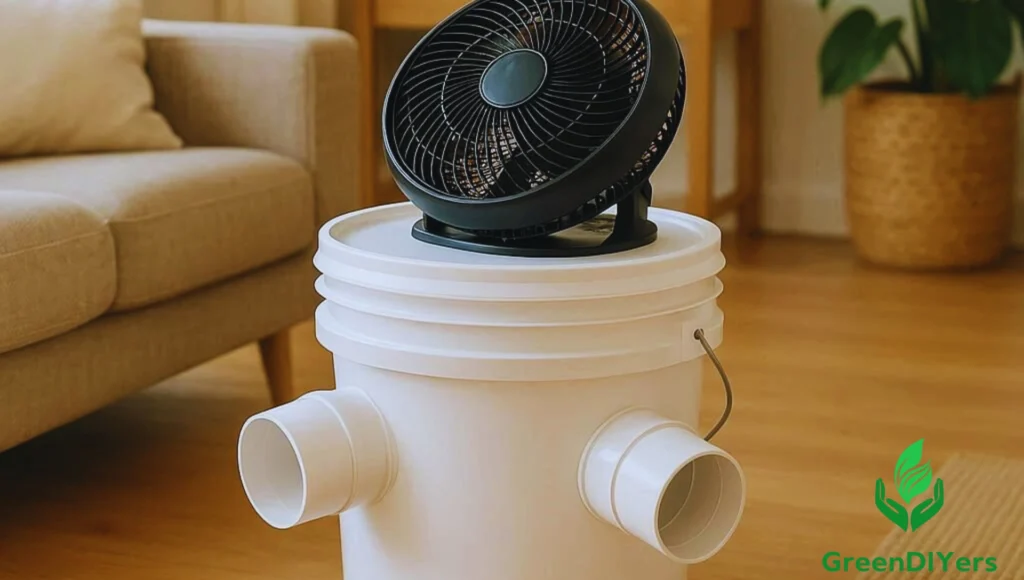
Design 1: The Classic “5-Gallon Bucket” DIY Air Conditioner
This is our flagship design – robust, effective, and surprisingly simple to build. Let’s create your own cooling powerhouse.
Materials You’ll Need (with approximate costs & where to buy)
Essential components:
- 5-gallon bucket with lid ($8-12 at Home Depot or Lowe’s)
- Small personal fan – USB or battery-powered ($15-25 on Amazon)
- 3-4 PVC pipe elbows, 1.5-2 inch diameter ($2-3 each at hardware stores)
- Drill with hole saw attachment ($30-50 if you don’t own one – consider borrowing)
- Marker and utility knife ($5 total)
- Ice or frozen water bottles (ongoing cost: $2-5 weekly)
Optional upgrades:
- Silicone caulk for sealing ($4-6)
- Weather stripping for lid seal ($3-5)
Total cost: $35-50 for basic version
Step-by-Step Instructions
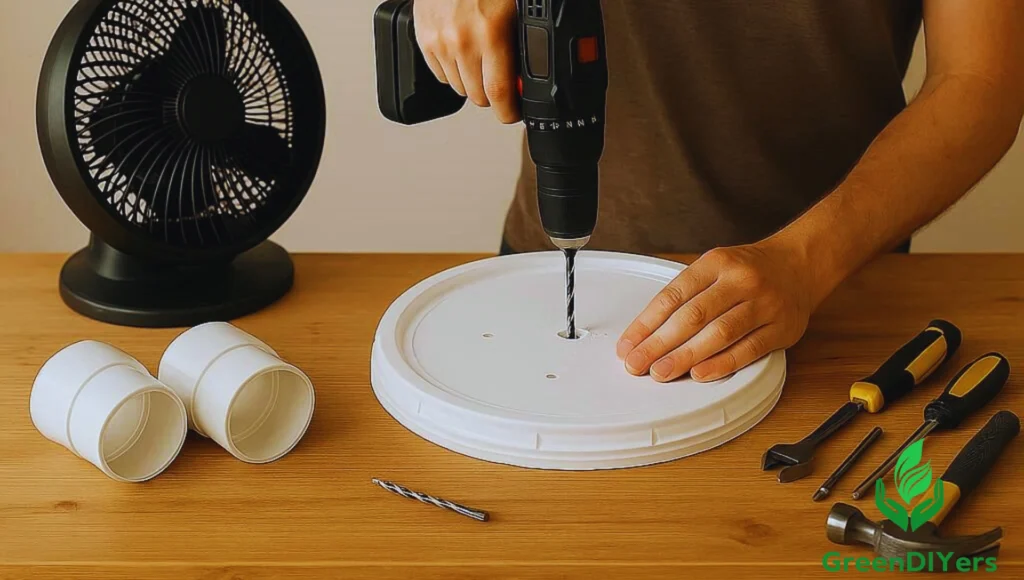
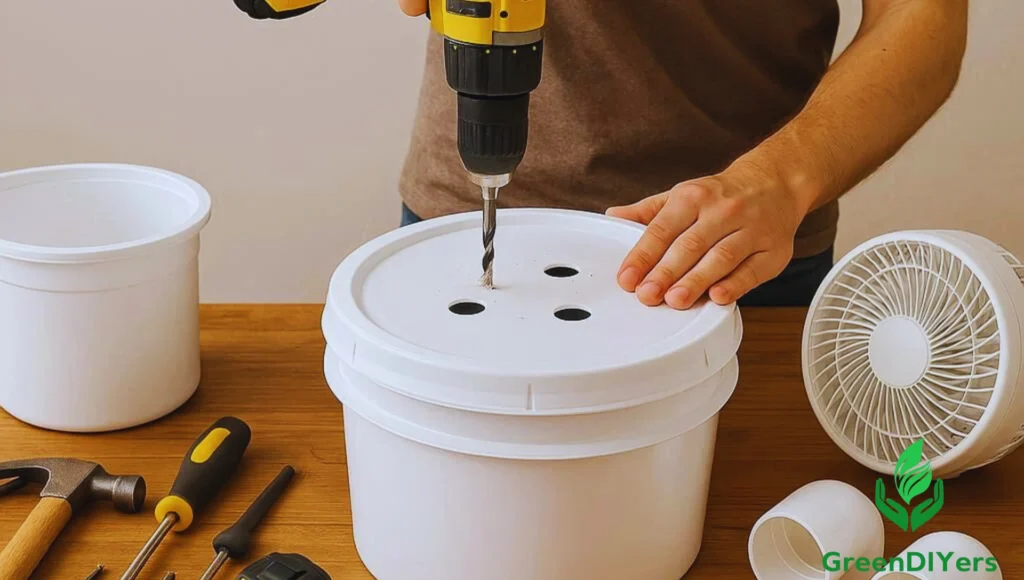
Step 1: Prepare the Lid Mark the center of your bucket lid and trace around your fan base. Using your hole saw (sized slightly smaller than your fan), cut a clean hole. The fan should sit snugly – not fall through, but not require excessive force.
Step 2: Prepare the Bucket Body Measure roughly 3 inches from the top of your bucket. Mark 3-4 evenly spaced points around the circumference. These will be your cold air outlets. Cut holes slightly smaller than your PVC pipe diameter – you want a snug fit.
Step 3: Insert & Secure PVC Pipes Push your PVC elbows into the holes from the outside, angling them slightly downward. The tight fit should hold them in place, but add a small bead of silicone caulk around each connection if desired.
Step 4: Mount the Fan Secure your fan to the lid, ensuring it blows air DOWN into the bucket, not up. Most personal fans have mounting screws or clips perfect for this. Double-check the airflow direction before final mounting.
Step 5: Load the Cooling Agent Fill your bucket about 2/3 full with ice or frozen water bottles. Don’t overfill – you need airspace for circulation. Frozen water bottles work exceptionally well because they’re reusable and create less mess.
Step 6: Assemble & Test Snap on the lid, plug in your fan, and feel for cold airflow from the PVC outlets. You should notice cooler air within 30 seconds.
Optimization Tips for Design 1
Maximize your cooling power:
- Use frozen water bottles: They last longer than loose ice, create no mess, and can be refrozen repeatedly
- Add salt to ice: This lowers the freezing point, keeping your ice colder longer (caution: salt can corrode metal components)
- Seal all gaps: Use weather stripping around the lid edge and silicone around pipe connections
- Strategic placement: Position your DIY air conditioner so cool air blows across your body, not just into the room
Troubleshooting Common Issues
Not blowing cold air?
- Check fan direction (should blow down into bucket)
- Verify ice hasn’t completely melted
- Look for air leaks around the lid
Water leakage?
- Don’t overfill with ice
- Check that all seals are tight
- Place on a waterproof tray
Poor airflow?
- Clear any ice blocking PVC outlets
- Ensure fan is running at full speed
- Check for debris in pipes
Design 2: The “Styrofoam Cooler” DIY AC (Simpler, More Portable)
Want something even easier? This lightweight version delivers similar results with simpler construction.
Materials List
- Medium styrofoam cooler with lid ($5-8)
- Small personal fan ($15-25)
- 2-3 cardboard tubes or small PVC pipes ($2-5)
- Ice or frozen water bottles
Build Instructions
The process mirrors our bucket design but with key differences:
- Styrofoam cuts easily with a knife (no drilling required)
- The material is less durable but much lighter
- Sealing can be trickier due to the material’s texture
Pros & Cons
Advantages:
- Cheaper initial cost
- Extremely lightweight and portable
- Easy to modify or repair
- Good insulation properties
Disadvantages:
- Less durable construction
- Styrofoam particles can break off
- Harder to achieve airtight seals
- Not suitable for heavy-duty use
Other Low-Cost & Passive Cooling Methods (Beyond DIY AC)
Your homemade air conditioner works best as part of a comprehensive cooling strategy.
Strategic Fan Usage
Window fan technique: Place a box fan in your window at night, pulling cool outside air in. Reverse it during hot days to push warm air out.
Cross-breeze creation: Position fans to create airflow paths through your space. One fan pulls air in, another pushes it out.
Ceiling fan optimization: Run counterclockwise in summer to push air down, creating a wind-chill effect.
Passive Cooling Techniques
Block that sun: Use reflective window film, blackout curtains, or even aluminum foil to prevent solar heat gain.
Strategic ventilation: Open windows when outside temperature drops below indoor temperature, typically at night.
Evaporative cooling: Hang damp towels in front of open windows or near fans for natural evaporation cooling.
Personal Cooling Strategies
Cool your core: Cold showers, ice packs on pulse points (wrists, neck, temples), and frozen water bottles against your skin provide immediate relief.
Stay hydrated: Your body’s natural cooling system (sweating) requires adequate hydration to function effectively.
When to Consider a Commercial Air Conditioner
Limitations of DIY Solutions
Let’s be honest about when your DIY air conditioner isn’t enough:
Scale limitations: Homemade units cool personal spaces, not entire rooms. If you need whole-room cooling, commercial units are necessary.
Humidity concerns: Ice-based cooling can actually increase indoor humidity as ice melts, potentially making you feel stickier.
Ongoing costs: Constantly buying ice and running fans can add up. Calculate your monthly costs versus a window AC unit.
Overview of Commercial Cooling Options
Portable AC units: No installation required, but they’re noisy and less efficient than window units.
Window AC units: More effective cooling per dollar spent, but they block your window and require some installation.
Mini-split systems: The most efficient option for targeted cooling, though they require professional installation.
FAQ: Your DIY Air Conditioner Questions Answered
Q: How long does the ice typically last? A: In a well-sealed unit, expect 4-6 hours of effective cooling. Frozen water bottles can extend this to 8-10 hours.
Q: Will my DIY AC cause mold or mildew? A: Only if you don’t maintain it properly. Empty completely after each use, dry thoroughly, and ensure good ventilation in your room.
Q: Can I use dry ice in my DIY air conditioner? A: Absolutely not. Dry ice creates carbon dioxide gas that can cause asphyxiation in enclosed spaces, plus it can cause severe burns.
Q: How much power does a DIY AC use? A: Very little – typically 5-15 watts for the fan, about the same as a bright LED bulb.
Q: Is it safe to leave running overnight? A: Generally yes, but ensure proper ventilation, place on a waterproof surface, and use a fan with safety certifications.
Conclusion
Building your own DIY air conditioner is a practical solution for specific situations – emergency cooling, temporary relief, budget constraints, or targeted personal cooling. While it won’t replace a commercial air conditioning system, it can provide meaningful comfort when you need it most.
Remember the key to success: realistic expectations, proper safety precautions, and understanding that this is a targeted cooling solution, not a room-wide climate control system.
Ready to beat the heat? Gather your materials, follow our step-by-step instructions, and start building your budget-friendly cooling solution today. Your future comfortable self will thank you!
Have you built your own DIY air conditioner? Share your experiences, modifications, and results in the comments below. We’d love to hear about your creative cooling solutions!