Are you tired of overpriced, wobbly bed frames that fall apart after a year? Or maybe you’re dreaming of a custom bed that perfectly fits your space and style, but can’t find anything like it in stores? Building your own diy bed frame might be the perfect solution you’ve been searching for.
I remember staring at a $800 bed frame online, knowing I could build something better for half the price. That’s exactly what I did – and you can too! Whether you’re a complete beginner who’s never held a power drill or an experienced DIYer looking for your next weekend project, this comprehensive guide will walk you through everything you need to know about creating your dream bed frame.
Table of Contents
Part 1: The Foundation – Why DIY Your Bed Frame?
Building a diy bed frame offers incredible benefits that go way beyond just saving money. Here’s why thousands of people are choosing to build their own:
Cost Savings That Actually Matter You’ll typically save 50-70% compared to store-bought options. A quality queen-size bed frame that costs $600 in stores? You can build it for around $150-250 in materials.
Complete Customization Freedom Want built-in storage? No problem. Need specific dimensions for your oddly-shaped bedroom? Easy. Dreaming of an upholstered headboard in that perfect fabric? You’ve got it.
Superior Quality Control When you choose every screw, every piece of wood, and every finish, you know exactly what you’re getting. No more mysterious manufacturing shortcuts or flimsy hardware.
The Satisfaction Factor There’s something incredibly rewarding about sleeping on a bed you built with your own hands. Every night becomes a reminder of what you can accomplish.
This guide covers everything from ultra-simple weekend builds to advanced upholstered designs. We’ll explore different styles, materials, and skill levels, ensuring you find the perfect project for your abilities and needs.

Part 2: Planning Your Perfect DIY Bed Frame
Before You Start: Essential Planning & Considerations
Success starts with smart planning. Before you buy a single board or pick up a tool, let’s map out your project.
Choosing Your Bed Frame Style & Function
Platform Bed The most popular choice for DIY builders, platform beds offer clean lines and modern appeal. They’re essentially a raised surface that supports your mattress directly – no box spring needed. Perfect for beginners because they require minimal joinery and can be built with basic tools.
Pros: Simple construction, modern look, space-saving Cons: Limited storage options, might be too low for some preferences
Storage Bed These clever designs incorporate drawers or lift-up storage compartments. While more complex to build, they’re perfect for small bedrooms or anyone needing extra storage space.
Pros: Maximizes bedroom storage, great for small spaces Cons: More complex construction, higher material costs
Minimalist/Floating Bed Creates the illusion that your mattress is floating by hiding the support structure. These modern designs work especially well in contemporary bedrooms.
Pros: Striking visual impact, easy to clean underneath Cons: Requires careful planning for hidden supports
Integrated Headboard/Footboard Combines the bed frame with attached headboard and sometimes footboard elements for a cohesive look.
Pros: Complete bedroom solution, professional appearance Cons: More materials and time required
Upholstered Options Add fabric, foam, and batting to create a soft, hotel-like feel. Great for those who love reading in bed or want a more luxurious aesthetic.
Pros: Comfortable, customizable fabrics, professional appearance Cons: Additional materials and skills needed
Selecting the Right Materials
Wood (Most Popular Choice)
Pine: Affordable and easy to work with, but softer and more prone to dents. Perfect for painted finishes.
- Cost: $
- Difficulty: Beginner-friendly
- Durability: Good for lighter use
Poplar: Slightly harder than pine with a smooth finish. Takes paint beautifully and offers better durability.
- Cost: $$
- Difficulty: Beginner-friendly
- Durability: Very good
Oak: Premium hardwood with beautiful grain patterns. More expensive but incredibly durable and long-lasting.
- Cost: $$$
- Difficulty: Intermediate (harder to cut and drill)
- Durability: Excellent
Plywood: Engineered wood that’s strong, stable, and comes in large sheets. Perfect for platform surfaces and modern designs.
- Cost: $$
- Difficulty: Beginner-friendly
- Durability: Very good
Alternative Materials
Reclaimed Wood: Pallets, old doors, or barn wood can create stunning rustic beds. Always inspect for nails, chemical treatments, and structural integrity before using.
Metal Tubing: Steel or aluminum tubing can create industrial-style frames. Most DIYers use bolt-together methods rather than welding.
Essential Tools You’ll Need
Basic Hand Tools (Every Project Needs These):
- Measuring tape (25-foot recommended)
- Pencil and square for marking
- Hand saw or jigsaw for cuts
- Power drill with bits
- Clamps for holding pieces during assembly
- Sandpaper (120 and 220 grit)
Power Tools (Highly Recommended):
- Miter saw for precise crosscuts
- Circular saw for ripping boards
- Orbital sander for smooth finishes
- Impact driver for driving screws efficiently
Safety First: Always wear safety glasses, work gloves, and a dust mask when sanding or cutting.
Understanding Dimensions & Sizing
Before designing your diy bed frame, you need to know standard mattress dimensions:
- Twin: 38″ × 75″
- Full: 54″ × 75″
- Queen: 60″ × 80″
- King: 76″ × 80″
- California King: 72″ × 84″
Add 1-2 inches to each dimension for your frame’s interior dimensions to ensure easy mattress placement. Consider the overall height – most people prefer their mattress top to be 24-26 inches from the floor for easy sitting.
Part 3: Step-by-Step DIY Bed Frame Projects
Easy Weekend Projects: Beginner-Friendly Bed Frames
Project 1: The Ultra-Simple Platform Bed (No Legs)
Perfect for renters or anyone wanting a low-profile, modern look
Materials Needed:
- 1 sheet ¾” plywood (60″ × 80″ for queen)
- 2×4 lumber for perimeter frame
- Wood screws (2½” and 1¼”)
- Sandpaper
- Wood stain or paint
Estimated Cost: $75-100 Time Required: 3-4 hours
Step-by-Step Instructions:
- Cut your materials: Have the lumber yard cut your plywood to mattress dimensions plus 1 inch on each side. Cut 2×4s for perimeter frame.
- Build the frame: Create a rectangular frame using 2×4s, joining corners with 2½” screws. This frame should match your plywood dimensions exactly.
- Attach the platform: Place plywood on top of frame and secure with 1¼” screws every 8 inches around the perimeter.
- Sand and finish: Sand all surfaces with 120-grit, then 220-grit sandpaper. Apply your chosen stain or paint.
- Final assembly: Once finish is dry, place in bedroom and add mattress.
This simple design sits directly on the floor, creating a modern, minimalist look while providing solid mattress support.
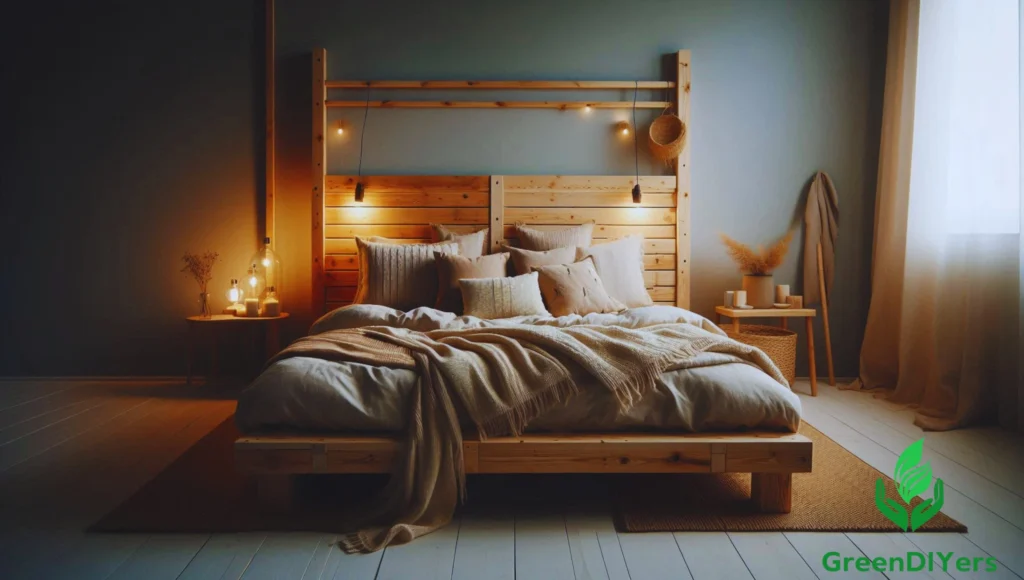
Project 2: Basic Wooden Platform Bed with Legs
A step up in complexity but still very manageable for beginners
Materials Needed:
- 1 sheet ¾” plywood (cut to mattress size + 1″)
- 8 pieces 2×4 × 8′ lumber
- 4 pieces 4×4 × 6″ for legs
- Wood screws (2½” and 3″)
- Wood glue
- Sandpaper and finish
Estimated Cost: $125-175 Time Required: 6-8 hours over a weekend
Detailed Instructions:
- Create the support frame: Cut 2×4s to create a frame that’s 6 inches smaller than your plywood on all sides. This creates an overhang for visual appeal.
- Add center support: For queen size and larger, add a center beam running lengthwise for extra support.
- Attach legs: Cut 4×4 posts to desired height (typically 12-16 inches). Attach to frame corners using wood glue and 3″ screws.
- Install platform: Attach plywood platform to frame with 2½” screws every 8 inches.
- Sand and finish: Sand progressively from 120 to 220 grit. Apply your chosen finish – natural wood stain shows off the grain beautifully.
This elevated design provides better airflow under the mattress and creates storage space underneath.
Intermediate Builds: Adding Style & Functionality
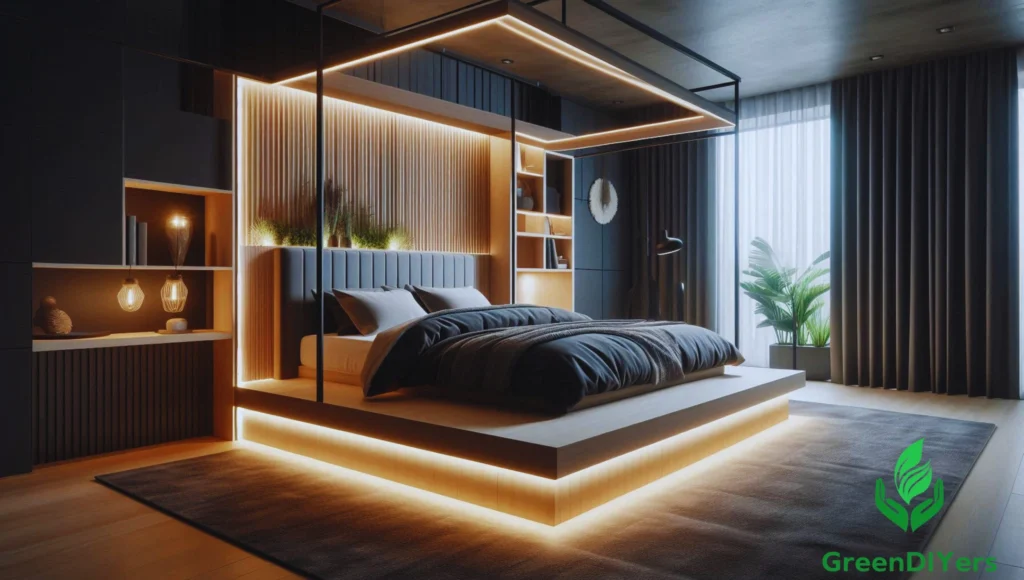
Project 3: Modern Floating Bed Frame
Creates a stunning visual effect that makes your mattress appear to float
Materials Needed:
- Plywood platform materials (as above)
- 2×6 lumber for hidden frame
- LED strip lighting (optional but recommended)
- Heavy-duty wall anchors
- French cleat hanging system
Key Construction Points:
The secret to a floating bed is hiding the support structure. Build a sturdy frame that mounts to the wall studs, extending out to support the mattress platform. The platform itself appears to have no visible supports from most viewing angles.
Special Considerations:
- Must anchor into wall studs for safety
- Weight capacity depends on wall attachment strength
- Consider electrical access for integrated lighting
Project 4: Storage Bed with Integrated Drawers
Maximize your bedroom’s storage potential
Materials Focus: This project requires careful planning for drawer construction. Use quality drawer slides rated for the weight you’ll be storing. Build drawer boxes from ½” plywood with solid wood fronts for durability.
Construction Highlights:
- Frame must be precisely square for proper drawer operation
- Install drawer slides before final assembly when possible
- Plan drawer depths carefully – bedding storage needs different dimensions than clothing
Advanced Designs: Customization & Upholstery
Project 5: Upholstered Platform Bed Frame
Create a luxurious, hotel-style bed with custom fabric
Materials Include:
- Platform bed base (from earlier projects)
- High-density foam (2-3 inches thick)
- Batting for smooth finish
- Upholstery fabric (calculate based on dimensions plus wrap-around)
- Button tufting supplies
- Heavy-duty stapler and staples
Upholstery Process: Start with a solid platform base. Add foam padding, then batting for a smooth surface. Stretch fabric tightly and secure with heavy-duty staples on the underside. For tufted effects, drill holes through the platform and use long upholstery needles to create button details.
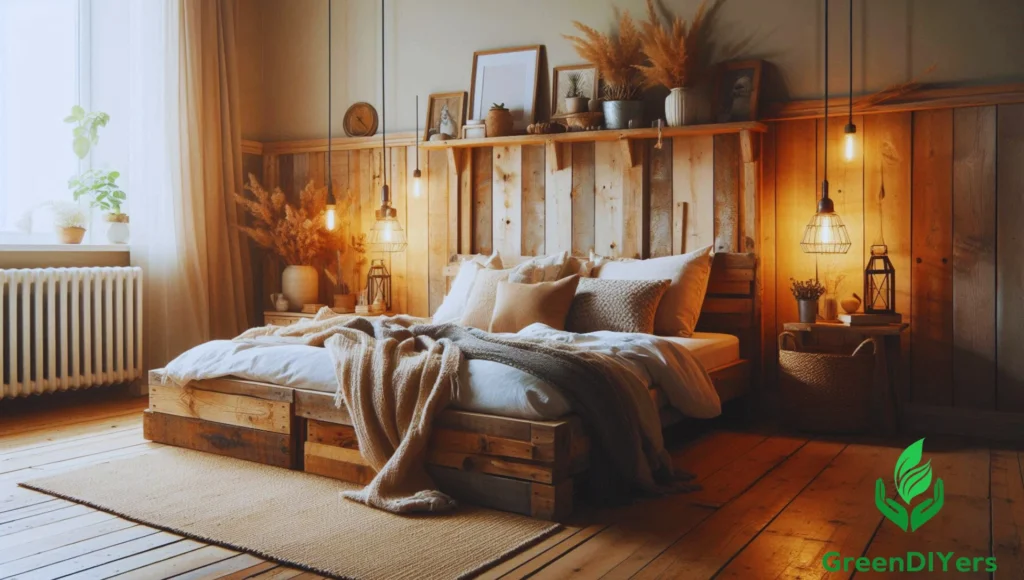
Project 6: Rustic Farmhouse Bed Frame with Integrated Headboard
Combine reclaimed materials for character-rich furniture
Design Elements:
- Chunky 4×4 or 6×6 posts for substantial presence
- Reclaimed barn wood or weathered lumber for character
- Traditional joinery techniques like mortise and tenon
- Distressed finishing techniques for authentic aged appearance
Finishing Tips: Layer different stain colors, sand through to underlying wood in wear areas, and use steel wool with vinegar solution to create authentic weathering effects.
Part 4: Finishing Touches & Maintenance
Finishing Your DIY Masterpiece
Sanding & Prep
Proper surface preparation makes the difference between amateur and professional-looking results. Start with 120-grit sandpaper to remove any rough spots, then progress to 220-grit for smoothness. Always sand with the grain, and vacuum between grits.
Staining & Painting
For natural wood beauty, choose penetrating stains that enhance grain patterns. For painted finishes, use high-quality primer first, then apply paint in thin, even coats. Water-based finishes dry faster but oil-based often provide richer colors.
Sealing & Protecting
Protect your investment with appropriate topcoats. Polyurethane provides excellent durability for high-wear surfaces, while paste wax offers a more natural feel with easier touch-up capabilities.
Maintaining Your DIY Bed Frame
Regular maintenance keeps your diy bed frame looking and functioning like new. Check all screws and bolts annually, tightening as needed. Clean wooden surfaces with appropriate wood cleaners, avoiding excessive moisture.
Addressing Common Issues:
- Squeaks often indicate loose fasteners or wood movement
- Add felt pads between touching wood surfaces
- Use wood glue on loose joints before retightening screws
Part 5: Pro Tips & Advanced Resources
Troubleshooting Common Issues
Preventing Squeaks: The key to a quiet bed frame lies in proper construction and materials. Use wood glue on all joints, even those that will be screwed. Place felt pads between any wood surfaces that might rub together. Choose quality hardware – cheap screws often work loose over time.
Dealing with Uneven Floors: Most floors aren’t perfectly level. Install adjustable feet on your bed legs, or use wooden shims to level the frame. A small level helps identify which corners need adjustment.
Cost-Saving Strategies:
- Check building supply store “cull” lumber sections for discounted materials
- Time purchases around major sales (spring and fall are typically best)
- Consider buying rough lumber and doing your own planing and sanding
- Join local woodworking groups where members often share bulk purchases
Planning Your Project Success
Remember that every expert was once a beginner. Start with simpler projects to build confidence and skills. Don’t rush – good craftsmanship takes time, and mistakes are more costly than patience.
Before You Begin:
- Measure your space carefully, including doorways and stairs
- Plan your workspace and ventilation for finishing
- Have a friend available for assembly help – some steps require extra hands
Your Dream Bed Awaits!
Building your own diy bed frame offers incredible satisfaction that goes far beyond the money you’ll save. Every night, you’ll rest on furniture you created with your own hands, perfectly customized to your needs and style preferences.
Whether you chose the simple weekend platform bed or tackled an advanced upholsered design, you’ve gained valuable skills and created something truly unique. The confidence you’ve built will serve you well in future projects.
Ready to start building? Choose your project from the options above and dive in! Remember, the most important step is the first one. Gather your materials, set up your workspace, and begin creating the bed frame you’ve been dreaming of.
Share your creations with fellow DIYers – your success story might inspire someone else to start their own building journey. The DIY community thrives on shared knowledge and encouragement.
Sweet dreams on your custom-built bed frame!
Ready to explore more DIY bedroom projects? Check out our guides on DIY Headboards, Best Mattresses for Platform Beds, and DIY Nightstands to complete your dream bedroom setup.