Picture this: you walk into your home office, and with a simple pull, it transforms into a cozy guest bedroom. That’s the magic of a diy murphy bed – the ultimate space-saving solution that’s been helping homeowners maximize their square footage for over a century.
A Murphy bed, also known as a wall bed or fold-down bed, is a hinged bed that stores vertically against a wall or inside a cabinet when not in use. The genius lies in its dual functionality – by day, your room serves its primary purpose, and by night, it becomes comfortable sleeping quarters.
So why build your own? First, there’s the cost savings. A professionally installed Murphy bed can cost $3,000-$8,000, while a diy murphy bed project typically runs $800-$2,500. Plus, you get complete control over the design, materials, and finish to match your existing décor perfectly. There’s also that incredible sense of accomplishment that comes with creating something both beautiful and functional with your own hands.
In this comprehensive guide, you’ll learn everything needed to build multiple Murphy bed styles, from classic vertical designs to space-efficient horizontal models and even advanced desk combos. We’ll cover detailed step-by-step instructions, safety protocols, troubleshooting tips, and customization ideas.
This guide is designed for intermediate DIYers with some woodworking experience. You should be comfortable using power tools and reading construction plans. If you’re a beginner, consider partnering with an experienced woodworker or taking a basic carpentry class first.
Safety Disclaimer: Building a diy murphy bed involves heavy materials, power tools, and creating a mechanism that will support human weight. Always prioritize safety, use proper protective equipment, and don’t hesitate to consult professionals when needed.
Table of Contents
Choosing Your Murphy Bed Style
Vertical Murphy Bed
The vertical Murphy bed is the classic design most people envision. The bed folds up lengthwise, with the headboard facing out when stored.
Pros:
- Maximum floor space recovery
- Works well with standard ceiling heights
- Easiest hardware installation
- Most hardware kit options available
Cons:
- Requires wall space equal to bed length (6+ feet for twin, 7+ for queen)
- Can look bulky in smaller rooms
Ideal for: Master bedrooms doubling as offices, guest rooms that serve multiple purposes, and rooms with ample wall height.
Horizontal Murphy Bed
With horizontal Murphy beds, the bed folds up widthwise, making them perfect for rooms with space constraints.
Pros:
- Works in rooms with lower ceilings
- Requires less linear wall space
- Can fit into wider, shorter spaces
Cons:
- Slightly more complex hardware
- May not save as much floor space
- Fewer pre-made hardware options
Ideal for: Basements with low ceilings, narrow rooms, and apartments where wall length is limited.
Murphy Bed Desk/Shelving Combo
This advanced design integrates workspace or storage directly into the Murphy bed cabinet.
Pros:
- Ultimate space efficiency
- Creates dedicated work area
- Higher perceived value
- Completely conceals bed when folded
Cons:
- Most complex build
- Higher material costs
- Requires more precise measurements
- Desk must be cleared before bed use
Ideal for: Home offices, studio apartments, teenagers’ rooms, and multi-purpose spaces.
Design Considerations
Before settling on a style, measure your room carefully. A queen diy murphy bed needs at least 8 feet of wall width (vertical) or height (horizontal), plus clearance for opening. Consider your existing décor – will you match current furniture or create a focal point?
Weight is crucial. A queen Murphy bed with mattress can weigh 200+ pounds, requiring quality hardware and proper wall anchoring. Never skimp on the mechanism – it’s the heart of your project.

Essential Planning & Preparation
Tools You’ll Need
Absolute Must-Haves:
- Circular saw with fine-tooth blade
- Power drill with bits
- 25-foot measuring tape
- 4-foot level
- Safety glasses and hearing protection
- Dust mask
- Work gloves
Recommended for Better Results:
- Table saw for precise cuts
- Miter saw for trim work
- Router for professional edges
- Kreg Jig for strong pocket holes
- Pneumatic brad nailer
- Random orbital sander
Safety Gear Spotlight: Never compromise on protection. Eye injuries from wood chips, hearing damage from loud tools, and respiratory issues from dust are completely preventable with proper PPE.
Materials List
Lumber:
- 3/4″ cabinet-grade plywood for main structure
- 1/2″ plywood for back panels
- 2×4 lumber for internal framing
- 1×4 boards for face frames and trim
Hardware Kit: This is your most important purchase. Quality mechanisms cost $200-$500 but ensure smooth, safe operation. Popular brands include Create-A-Bed, Murphy Bed Depot, and Rockler. Choose between piston (gas spring) systems for easier operation or traditional spring mechanisms for durability.
Fasteners:
- 2.5″ pocket screws
- 1.25″ wood screws
- 3″ construction screws for wall anchoring
- Wood glue
- Edge banding tape
Finishing Materials:
- Primer and paint or wood stain
- Polyurethane finish
- Wood filler
- Sandpaper (120, 220 grit)
Budgeting & Cost Calculator
Here’s a realistic breakdown for a queen vertical diy murphy bed:
- Hardware kit: $300-$450
- Lumber: $200-$350
- Fasteners/supplies: $75-$125
- Finish materials: $50-$100
- Mattress: $200-$800
Total estimated cost: $825-$1,825
Compare this to professional installation at $4,000-$6,000, and you’ll save significant money while gaining valuable skills.
Step-by-Step Build Guide: Vertical Queen Murphy Bed
Let’s walk through building a classic vertical queen Murphy bed. This approach provides a solid foundation you can adapt for other sizes and styles.
Step 1: Cutting Lumber & Preparing Pieces
Accurate cutting is crucial for a professional result. Start by creating a detailed cut list from your plans.
For a queen vertical bed, you’ll need:
- Two side panels: 84″ x 16″ (3/4″ plywood)
- Top/bottom panels: 62.5″ x 16″ (3/4″ plywood)
- Back panel: 84″ x 64″ (1/2″ plywood)
- Bed frame sides: 80″ x 6″ (3/4″ plywood)
- Bed frame ends: 60″ x 6″ (3/4″ plywood)
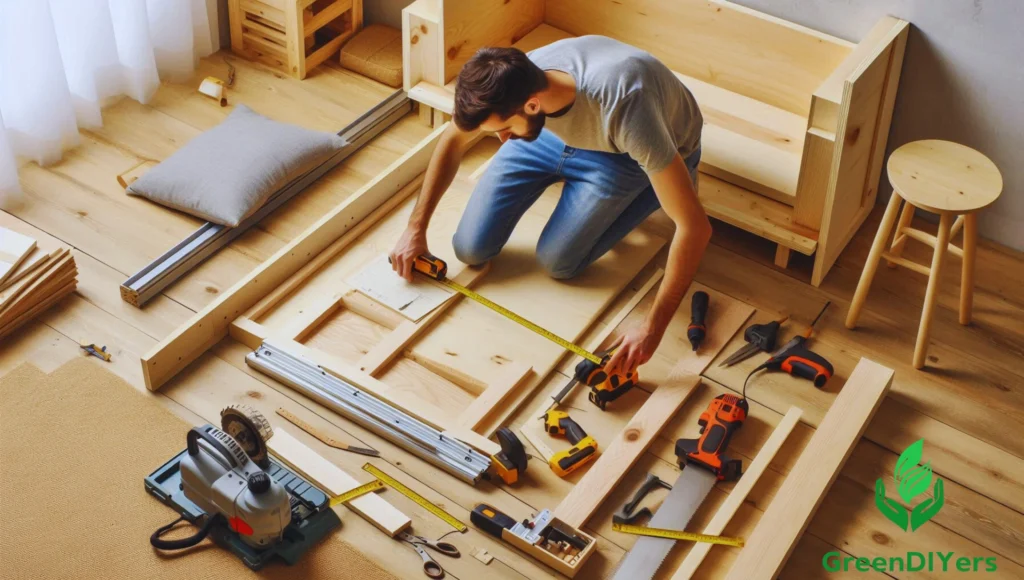
Use a circular saw with a straight edge guide or a table saw for clean cuts. Label each piece immediately after cutting to avoid confusion during assembly.
Safety Tip: Always support long cuts properly and never rush. A steady, controlled cut is safer and produces better results.
Step 2: Assembling the Cabinet Frame
Start with the main cabinet box. Using pocket holes creates strong, hidden joints perfect for this application.
Drill pocket holes on the inside faces of the top and bottom panels, positioned to connect with the side panels. Apply wood glue to joint surfaces before assembly – this significantly increases strength.
Clamp the assembly and check for square by measuring diagonals (they should be equal). Adjust as needed before driving screws.
Safety Tip: Support heavy panels during assembly to prevent injury and ensure accurate joints.
Step 3: Constructing the Bed Frame
The bed frame must be robust enough to support a mattress and sleepers safely. Build a rectangular frame using the pre-cut pieces, reinforcing corners with metal brackets or wooden gussets.
Install a slatted base or solid platform for mattress support. Slats should be spaced no more than 3″ apart for proper support. Sand all surfaces that will contact the mattress to prevent snags.
Step 4: Installing the Murphy Bed Hardware Kit
This is the most critical step. Follow your hardware manufacturer’s instructions exactly – they’re engineered for specific weight and balance requirements.
Mark mounting points precisely using the provided template. Pre-drill all holes to prevent splitting. Install the cabinet-side hardware first, then attach the bed frame components.
Test the mechanism before final assembly. It should operate smoothly with minimal effort. Adjust spring tension according to your mattress weight.
Safety Tip: Have a helper during hardware installation. These mechanisms are under significant tension and can cause injury if mishandled.
Step 5: Attaching the Bed Frame to the Cabinet
With hardware installed, connect the bed frame to the cabinet mechanism. This requires precise alignment – measure twice, drill once.
Test the opening and closing motion repeatedly. The bed should fold completely flush with the cabinet face and open to a fully horizontal position.
Step 6: Adding Panels & Finishing Touches
Install the back panel using 1.25″ screws every 8″ along edges. This provides crucial structural support and a finished appearance.
Add face frames and trim pieces for a professional look. Use edge banding on visible plywood edges for a seamless finish.
Step 7: Anchoring the Cabinet to the Wall
This step is absolutely critical for safety. A Murphy bed must be securely anchored to wall studs – drywall anchors alone are insufficient.
Locate studs using a reliable stud finder. Use 3″ lag screws through the cabinet back into at least two studs. Check that the cabinet is perfectly level and plumb before final tightening.
Safety Tip: If you can’t hit studs in the right locations, consult a contractor about installing blocking or alternative anchoring methods.
Step 8: Finishing
Proper finishing protects your investment and creates a beautiful result. Sand all surfaces starting with 120-grit, then 220-grit paper.
Prime bare wood before painting or staining. Apply finish in thin, even coats, sanding lightly between coats with fine paper.
Step 9: Mattress Installation & Final Testing
Choose a mattress within your hardware’s weight rating – typically 60-80 pounds for quality mechanisms. Install and test the complete system thoroughly before regular use.
Make final adjustments to ensure smooth, effortless operation.

Customization & Advanced Tips
Integrated Lighting
LED strip lighting under the cabinet provides ambient room lighting and helps with nighttime bed deployment. Install with a switch accessible when the bed is both open and closed.
Built-in Storage
Add side cabinets or overhead storage to maximize functionality. Ensure additional weight doesn’t exceed your hardware’s capacity.
Decorative Front Panels
Consider mirrored panels to visually expand the room, whiteboard surfaces for home offices, or custom artwork that reflects your style.
Troubleshooting Common Issues
Bed doesn’t close smoothly: Check for binding in the mechanism, ensure proper alignment, and verify nothing is obstructing the path.
Squeaking noises: Lubricate all pivot points with appropriate grease. Tighten any loose connections.
Cabinet isn’t square: This affects operation significantly. Loosen fasteners, re-square using diagonal measurements, and re-tighten.
Maintenance & Care
Inspect hardware quarterly for wear or loosening. Keep pivot points lubricated and check wall anchors annually. Clean surfaces regularly to maintain finish quality.
Conclusion
Building your own diy murphy bed is an incredibly rewarding project that combines practical problem-solving with fine craftsmanship. You’ve not only saved thousands of dollars but created a custom solution perfectly suited to your space and needs.
Remember, the key to success is careful planning, attention to safety, and patience during construction. Take pride in your accomplishment – you’ve built something that will serve your family for decades.
Have questions about your build? Share your progress and challenges in the comments below. The DIY community is here to help!
FAQ Section
Can I use any mattress? Choose mattresses within your hardware’s weight limit, typically under 80 pounds. Memory foam and latex tend to be heavier than traditional spring mattresses.
What if my walls aren’t perfectly straight? Use shims behind the cabinet to achieve level and plumb installation. Most walls have some irregularities that are easily accommodated.
How long does it take to build? Plan for 2-3 full weekends for an intermediate builder. This includes cutting, assembly, finishing, and installation time.
What’s the best wood for a Murphy bed? Cabinet-grade plywood provides the best strength-to-weight ratio. Avoid particleboard or MDF for structural components – they’re too heavy and less durable.

